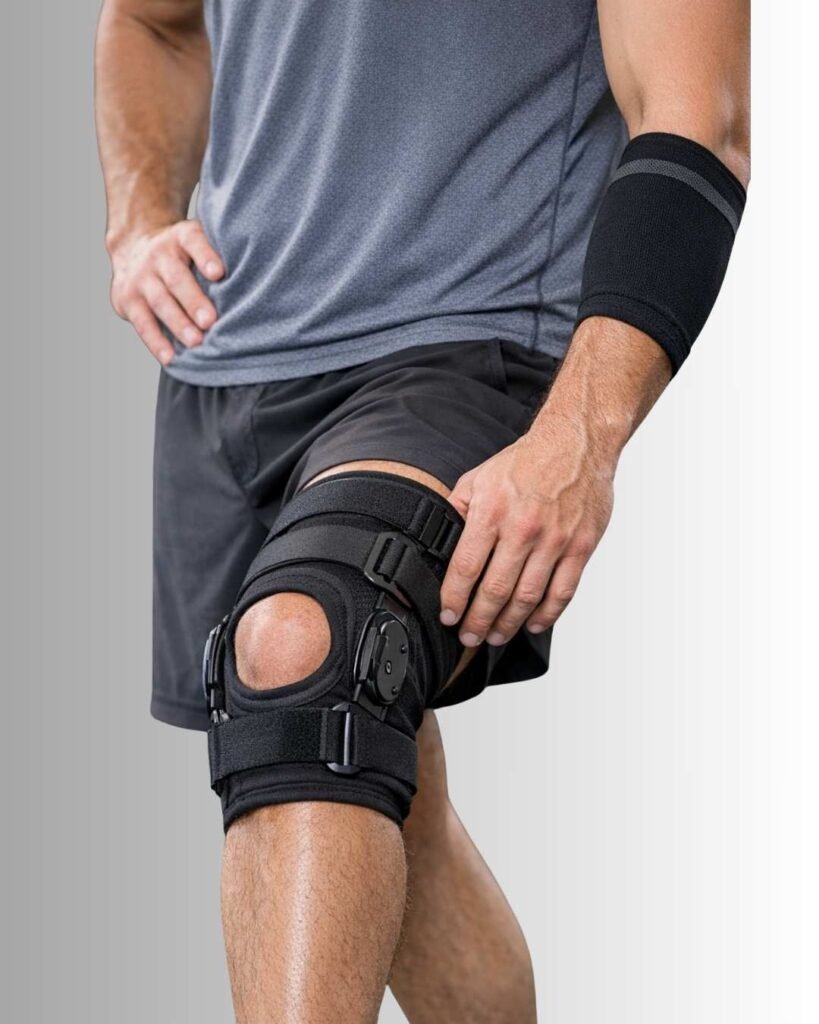
Custom bracing plays a vital role in healing from injuries, surgery, and chronic conditions. You may need support after knee surgery. You may need stability for a sports injury. Or you may need long-term help with osteoarthritis. In each case, knowing what happens at a custom bracing fitting helps you prepare. It also helps you get the best possible outcome.
At Tonic Physio in Milton, our certified brace fitters work closely with physiotherapists. Together they provide braces that match your exact measurements, condition, and activity goals. This guide explains every step of the fitting process. You will know what to expect. You will also know how to get the most from your custom brace.
You may also like to read about knee bracing after an ACL or meniscus injury.
Understanding Custom Bracing
Custom bracing differs from over-the-counter braces in several important ways. Standard braces come in general sizes. They give basic support. Custom braces are made for your body measurements and medical needs. This personal approach gives a better fit, more comfort, and more effective treatment results.
The custom bracing process involves detailed assessment and precise measurement. Sometimes it also uses 3D scanning or casting. The aim is a device that fits your body and lifestyle. At Tonic Physio, we combine this technical precision with clinical expertise. This helps your brace support your healing goals.
Step 1: Initial Assessment and Consultation
Your custom bracing journey begins with a full assessment. At this visit, your physiotherapist or brace fitter will discuss your medical history, current symptoms, and treatment goals. They will examine the affected area and assess your movement patterns. They will decide whether custom bracing suits your condition.
What Happens During Assessment
- Review of your injury history, surgical reports, or physician referrals
- Physical exam of the affected joint or limb
- Check of your current range of motion and strength
- Talk about your daily activities, work demands, and sports
- Review of any past bracing attempts and their results
This information helps decide the type of brace you need. It also shows which features will help you most. For example, an athlete recovering from knee surgery requires different support than someone managing osteoarthritis.
Step 2: Choosing the Right Brace Type
Modern bracing technology offers many options for different conditions and activity levels. Your provider will explain the choices. They will recommend designs that match your needs.
Common Custom Brace Types
- Knee braces: For ligament injuries, meniscus tears, osteoarthritis, and post-surgical healing. Options include hinged, unloader, and prophylactic designs.
- Ankle braces: For chronic instability, post-fracture support, and sports protection. Custom options fit shoes better than standard designs.
- Back braces: For spinal conditions, post-surgical support, and chronic back pain management. Custom spinal orthoses spread pressure well.
- Wrist and hand braces: For carpal tunnel syndrome, tendonitis, fracture healing, and arthritis. Custom making gives exact joint positioning.
- Elbow braces: For tennis elbow, golfer’s elbow, and post-surgical healing. Counterforce and stabilization designs suit different conditions.
- Shoulder braces: For rotator cuff injuries, dislocation healing, and instability. Custom shoulder orthoses control complex joint motion.
Your provider will explain the pros and cons of different materials, closure systems, and adjustment parts. You decide together. This way you get a brace that fits both your clinical needs and your personal preferences.
Step 3: Precision Measurement and Molding
Accurate measurement is the foundation of effective custom bracing. This step makes sure your device fits precisely. It gives the best support without discomfort or skin irritation.
Measurement Techniques
Depending on the brace type and your needs, your fitter may use one or more of these methods:
- Manual measurement: Flexible tape measures record circumferences, lengths, and angles at many points around the affected area
- 3D scanning: Advanced digital scanners capture the exact surface shape. They create detailed models of your limb or joint
- Plaster casting: A traditional method. Quick-setting plaster makes exact molds. It is especially useful for complex shapes or when top precision is needed
- Foam impression: Special foam boxes capture the shape when you press the affected area into the material
Measuring usually takes 20-45 minutes, depending on complexity. Your fitter will place you in set postures. This makes sure the brace works well in your daily activities.
Step 4: Brace Fabrication
After measurements are done, your custom brace moves into fabrication. This turns raw materials into a device shaped for your body.
What Happens During Fabrication
Custom braces are made with medical-grade materials. They are chosen for strength, flexibility, and biocompatibility. Common materials include:
- Thermoplastic polymers: Light, moldable materials that you can adjust slightly after the first fitting
- Carbon fiber composites: Very strong and light, ideal for high-performance uses
- Aluminum and titanium: Used for parts that need great strength
- Memory foam and silicone padding: Pressure-spreading materials that add comfort during long wear
- Breathable fabrics: Moisture-wicking liners that improve hygiene and comfort
Fabrication usually takes 1-3 weeks, depending on complexity and manufacturer. During this time, your provider may recommend temporary bracing or massage therapy to manage symptoms while you wait.
Step 5: Fitting and Initial Adjustment
When your custom brace arrives, you return for a fitting visit. This key step makes sure the device works as intended. It also checks that it feels comfortable enough for regular use.
The Fitting Process
- Your fitter positions the brace and secures all straps and closures
- They check contact points for pressure areas or gaps
- You do basic movements to test how the brace works
- Your fitter observes how the brace moves with your body
- Your fitter makes first adjustments to straps, hinges, or padding
- You learn how to put on, take off, and adjust the brace
This visit usually lasts 30-60 minutes. Bring the shoes you usually wear. Bring clothing that gives easy access to the affected area. If you use custom orthotics, bring those as well. They affect lower limb alignment.
Step 6: Movement Testing and Functional Assessment
After the first fitting, your physiotherapist does functional testing. This makes sure the brace supports your movement goals. This step bridges the gap between passive fitting and active healing.
What Functional Testing Includes
- Walking gait analysis to see how the brace affects your stride
- Stair climbing and descending to test stability in hard movements
- Balance assessment on stable and unstable surfaces
- Sport-specific movements if you are returning to sports
- Range of motion testing with and without the brace
Your physiotherapist may find that more adjustments are needed. They may also recommend other treatments to go with the brace. Active rehabilitation exercises often go with bracing. They build strength that can reduce your need for outside support over time.
Step 7: Education and Home Care Instructions
Proper brace use goes beyond wearing the device. You also need to know about care, upkeep, and warning signs. This keeps your brace effective and comfortable throughout its life.
What You Will Learn
- How to put on and remove your brace correctly
- Daily wear schedule and gradual break-in period
- Skin care to prevent irritation and pressure sores
- Cleaning instructions for the brace and liners
- When to tighten or loosen adjustments
- Signs that you need a follow-up visit
- Changes to your activities while wearing the brace
Most custom braces need a break-in period of 1-2 weeks. During this time, you slowly increase wear time. You also watch your skin condition and comfort. Your fitter gives you a set schedule based on your brace type and skin sensitivity.
Step 8: Follow-Up Appointments
Custom bracing needs ongoing checks to stay effective. Your follow-up schedule depends on your condition and how quickly you adapt to the brace.
Typical Follow-Up Timeline
- 1-2 weeks post-fitting: Check skin condition, assess comfort, make minor adjustments
- 1 month: Check how it works in daily activities, address any concerns
- 3 months: Full assessment of brace fit, function, and wear patterns
- Ongoing: Regular check-ups every 3-6 months for long-term bracing, or as your condition changes
Children and adolescents need more frequent follow-ups because they grow. Adults with progressive conditions also need regular assessment. This makes sure the brace keeps meeting their needs.
Understanding Brace Wear and Care
Daily Wear Guidelines
Your provider will tell you when to wear your brace. Some conditions need full-time wear. Others need support only during certain activities. Following these guidelines helps you get the best outcomes:
- Wear the brace as prescribed, even when symptoms improve
- Remove for bathing unless it is designed for water exposure
- Check skin after each wear period, especially early in treatment
- Report any rubbing, pressure points, or skin changes promptly
- Wear it consistently so your body can adapt
Cleaning and Maintenance
Proper upkeep extends brace life and prevents skin issues:
- Wipe plastic or metal parts with mild soap and water daily
- Wash fabric liners as the maker says
- Let all parts dry fully before putting the brace back together
- Check hinges, straps, and closures weekly for wear
- Store in a cool, dry place away from direct sunlight
When to Contact Your Brace Provider
Some situations need prompt professional attention:
- Skin breakdown, blisters, or persistent redness
- Big changes in pain while wearing the brace
- Breakage such as broken hinges or torn straps
- Changes in body weight that affect brace fit
- New symptoms in areas not previously affected
- Brace slipping out of position
At Tonic Physio, we put your support first throughout your bracing journey. Contact us right away if you have any concerns between scheduled visits.
Combining Bracing with Physiotherapy
Custom braces work best as part of full rehabilitation. At Tonic Physio, we combine bracing with:
- Physiotherapy to treat underlying weakness and movement problems
- Massage therapy to reduce muscle tension around supported joints
- Shockwave therapy for stubborn soft tissue conditions
- Manual osteopathy for whole-body alignment and function
- Exercise programs to build strength that may reduce your need for bracing in time
This team approach makes sure your brace supports healing. Meanwhile, the underlying issues are treated with the right therapy.
Cost and Insurance Coverage
Custom bracing is an investment in your health and mobility. Costs vary with complexity, materials, and how much is customized. At Tonic Physio, we give detailed quotes before fabrication begins.
Many extended health insurance plans cover custom bracing when a physician or physiotherapist prescribes it. We help with insurance paperwork. We can direct bill participating insurers. Workers compensation and motor vehicle accident insurance may also cover bracing for workplace or accident injuries.
Custom bracing technology keeps advancing. New materials and designs improve comfort and function. Modern braces are lighter, stronger, and more discreet than earlier ones. Some use smart technology. It tracks wear patterns, activity levels, and compliance. This gives useful data to providers and patients.
At Tonic Physio, we stay current with these changes to offer you the best options. You may need a simple support brace. You may need an advanced orthotic device. Our team has the skill to guide your choice and help you get the best outcomes.
Frequently Asked Questions About Custom Bracing
How long does a custom brace last?
With proper care, custom braces usually last 2-5 years. Lifespan depends on materials, how often you wear it, and activity level. Regular upkeep and timely repairs help it last.
Will I need to wear the brace forever?
Not necessarily. Many patients use braces for a short time during healing or rehabilitation. Some chronic conditions may need long-term use. Your provider regularly checks whether you still need the brace.
Can I exercise or play sports while wearing a brace?
Many custom braces are designed for athletic activities. Your provider will give activity guidelines based on your brace type and condition. Sport-specific braces protect you while allowing the movement you need.
How tight should my brace feel?</c/h3>
Your brace should feel snug but not painful. You should be able to fit one finger between the brace and your skin at most contact points. Numbness, tingling, or color changes mean it is too tight. It needs adjusting.
What if my brace causes skin irritation?
Some minor redness at first is normal during the break-in period. Lasting irritation, blistering, or skin breakdown needs professional attention. Your fitter can adjust padding, change contact areas, or recommend barrier products.
Can I travel with my custom brace?
Yes, custom braces travel well. Bring your brace to the airport as carry-on if possible. Tell security staff that you wear a medical device. Consider bringing adjustment tools and spare padding for long trips.
Conclusion: Taking the Next Step
Custom bracing offers precise, personal support that standard braces cannot match. Knowing the fitting process helps you prepare in mind and body. You will get the most benefit from your device.
At Tonic Physio in Milton, our brace fitting process combines technical skill with caring support. From first assessment through follow-up adjustments, we are committed to your comfort and healing.
Are you considering custom bracing for injury healing, surgical rehabilitation, or chronic condition management? To schedule your assessment, contact Tonic Physio today. Our experienced team will guide you through every step. You will get a brace that truly supports your path to better movement and less pain.